Complete Discord User Guide
This Guide will explain most of the tons of different features Discord has to offer. The content will be separated into different sections. You can navigate to the different sections by clicking on the links below or by scrolling down until you find what you want.
Contents / Divided Sections:
1. Discord – Loading the web client
2. Discord Desktop Client
3. Getting To Know Discord
4. Account Settings
5. Server Settings
6. Friends
Why Discord?
Discord is an All-in-one voice and text chat program which allows us to communicate with each other by voice, by channel chats in the voice, by text in the public chat and by talking to people in private conversations. Most of our members who have tried different products for online teleconferencing agree that it’s the best product currently available. If you want to know about anything not covered here, you can check out Discord’s own sales pitch here: https://discordapp.com/features
1. Discord Web Client
You can use Discord from within your favourite web browser, without installing any special software. It looks pretty much the same as the dedicated app, and is meant to work the same way. However – ask anyone who has tried both options, and they will tell you to install the application (see below).
| http://lochac.sca.org/discord | Step 1: Locating Discord The easy way to get there is by visiting the Lochac web site, and then sticking “discord” on the end of the URL. |
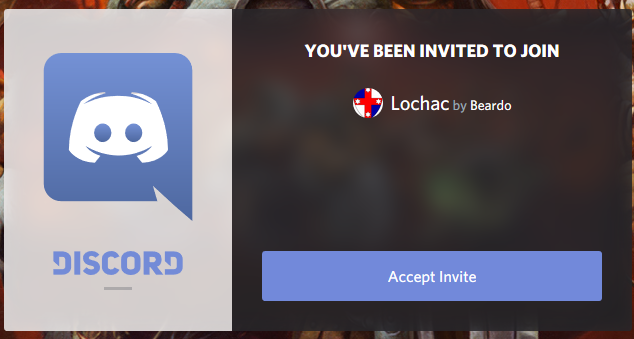 |
Step 2: Joining Discord
If it’s your first time with Discord, you will see this screen after you click ‘connect’. Click the “Accept Invite” button, and then enter any name you wish (your society name is the obvious choice) as your user name in Discord. |
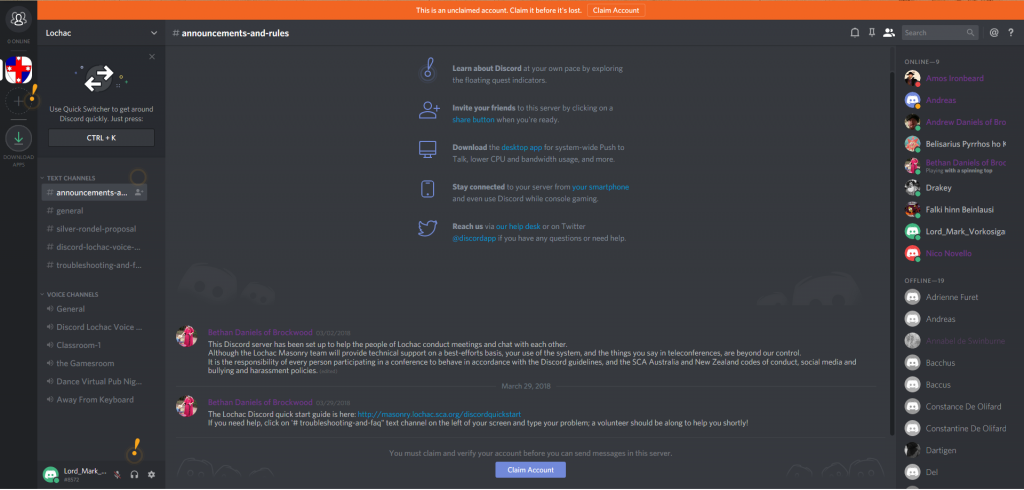 |
Step 3: Claiming an account on Discord
This is what you’ll see upon connecting. In the orange bar at the top click ‘Claim Account’. You will also see a couple of these floating around:
You can click on the exclamation marks for an instant explanation of what that part of the screen does. But claim your account first! |

You’ll see this.
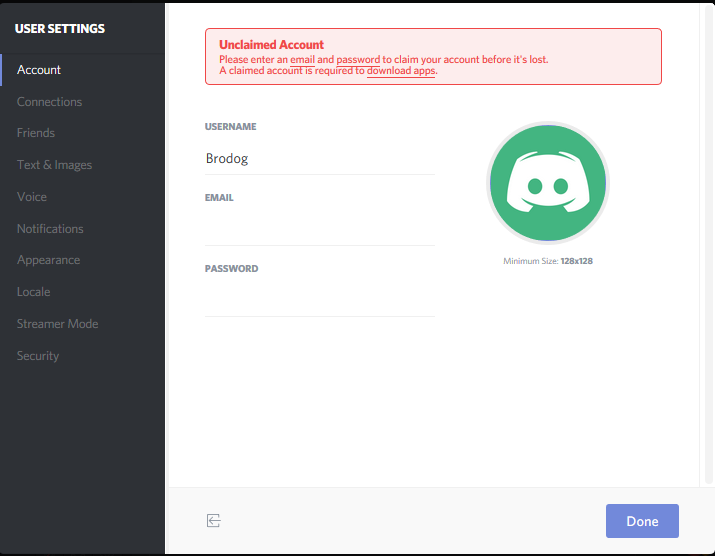
Enter your Email and Password. Click done to save. (An email and password that you will use to login)
Now just verify you Email and congrats you now have an account on Discord.
Now bookmark it! Save the address https://discordapp.com/channels/@me as a favourite. A lot of the time, that link will take you straight back into the Lochac server in future, without you having to login. It depends on how your PC is set up to handle cookies.
2: Discord Desktop Client
As said earlier, it is highly recommended that you use the Desktop Client. If you’re sticking to the Web Client, skip down to Getting to Know Discord.
Step 1: Downloading and installing the Desktop Client
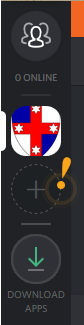
If you’re currently logged into the web version, then go to the bottom left of your screen, where your name is located.
| It’ll look like this. | 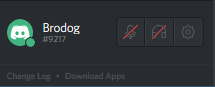 |
Click download apps, just below your name.
| This will appear. | 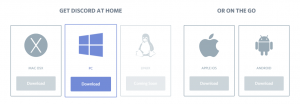 |
Choose the client you use. The one Discord thinks you will want will already be highlighted.
Install it and start it up.
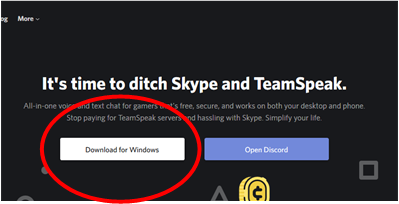 If you aren’t already logged in to the web client, then just go to the web page at https://discordapp.com and click the button that says “Download Windows App” (if you visit this web page on a Mac or an iPhone or an Android phone, the button will change to show the app that you need).
Step 2: Logging in on the Discord Client
| The first screen you will be prompted with when starting up Discord will be this. | 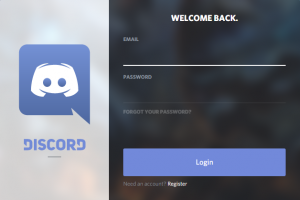 |
Enter the Email and Password that you used to claim your account.
You will automatically connect to Lochac’s Discord.
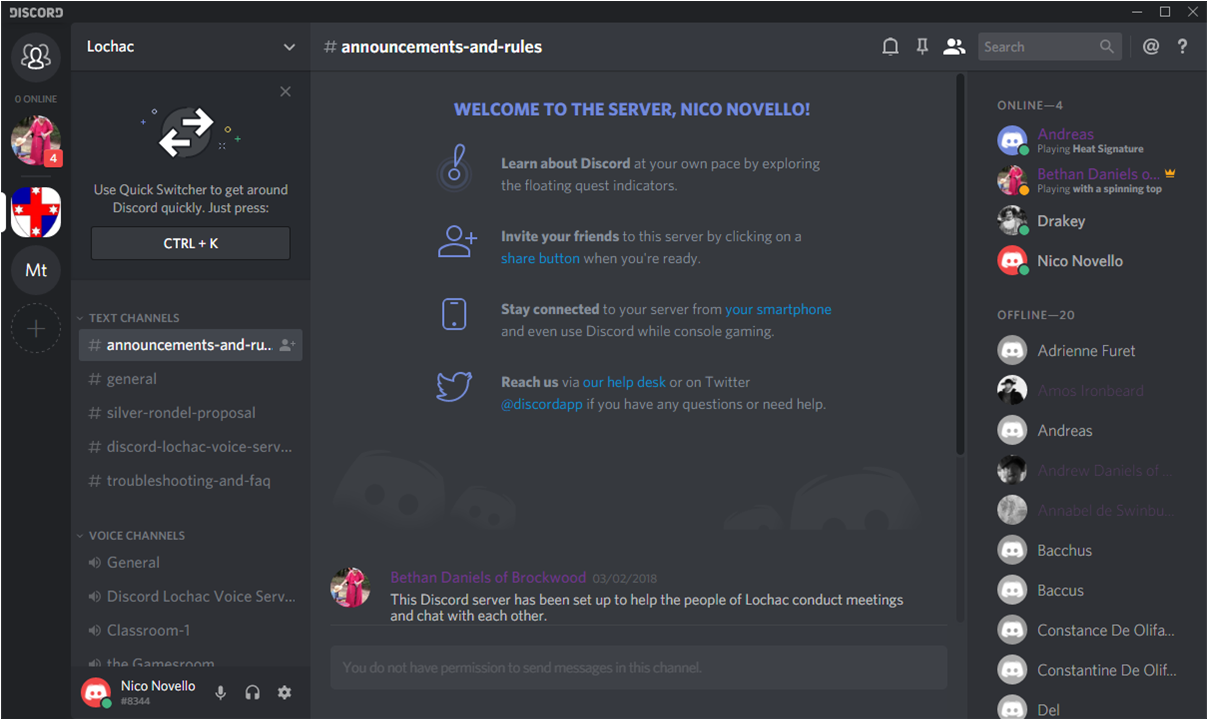
This is basically what you’ll see. Depending on who else is on line, or what conversations are going on, there may be more or fewer names and messages visible.
Getting To Know Discord
Over on left, you will see a list of the different text channels available to you. These are just like message threads on Facebook or in a mailing list. Click on the name of any channel to see the messages. You will probably see announcements and rules highlighted, because you will be sent there by default.
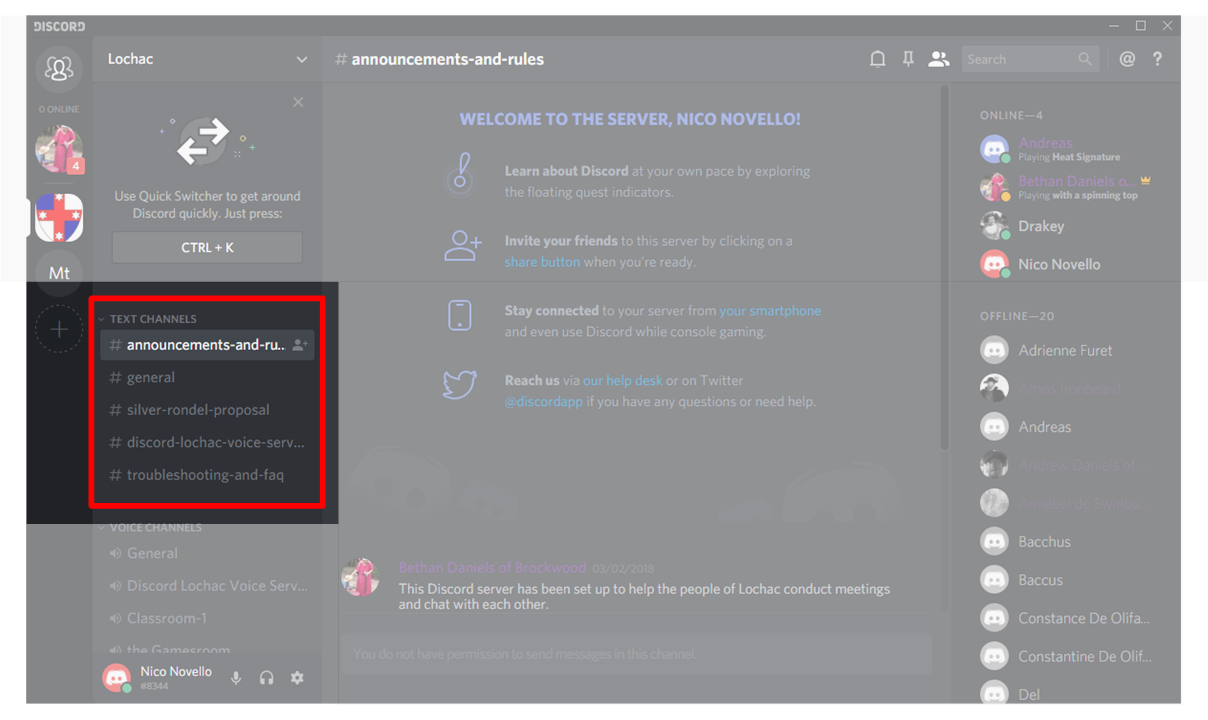
Below those (and you may need to scroll down, if there are a lot of text channels listed) you will see the different voice channels available to you.
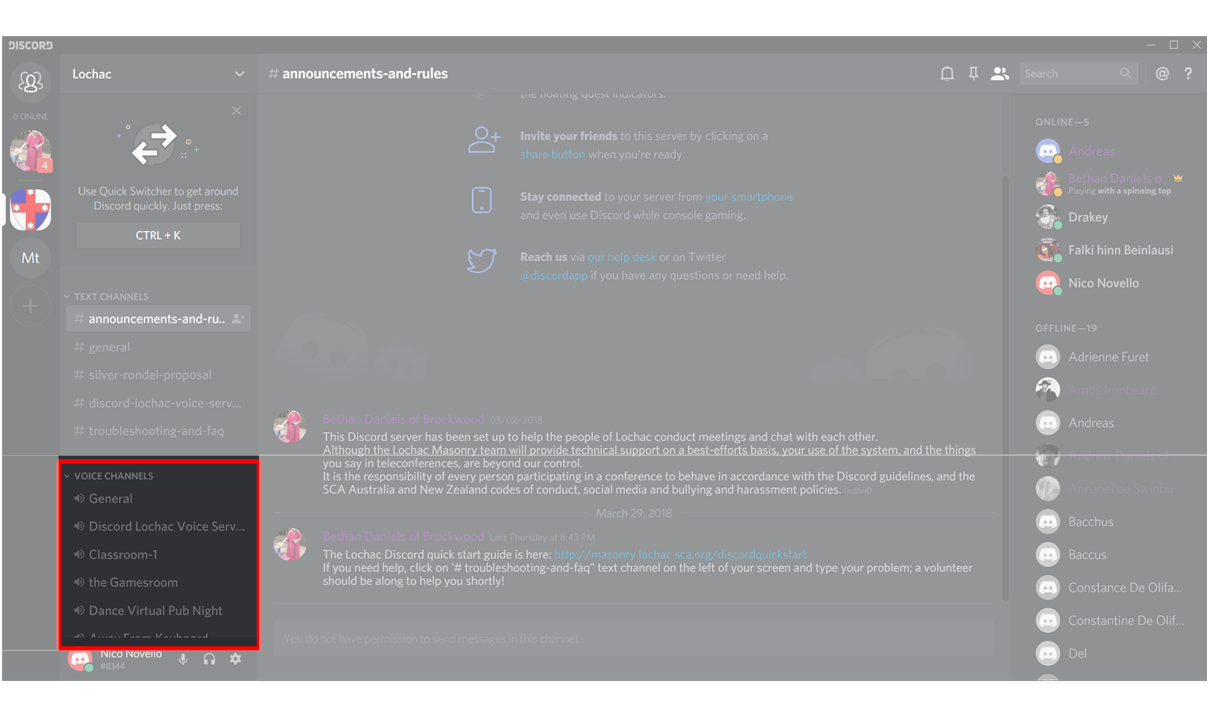
Take a closer look at the bottom entry in the list of voice channels. You will see one called Away From Keyboard. This is the equivalent of putting your phone on hold – if you need to duck out of a conversation, click on that channel and the other people in the conversation will know that you are not ignoring them, you are (literally) away from your keyboard. If you leave Discord running without actually doing anything for a while, the system will automatically put you into the AFK channel.
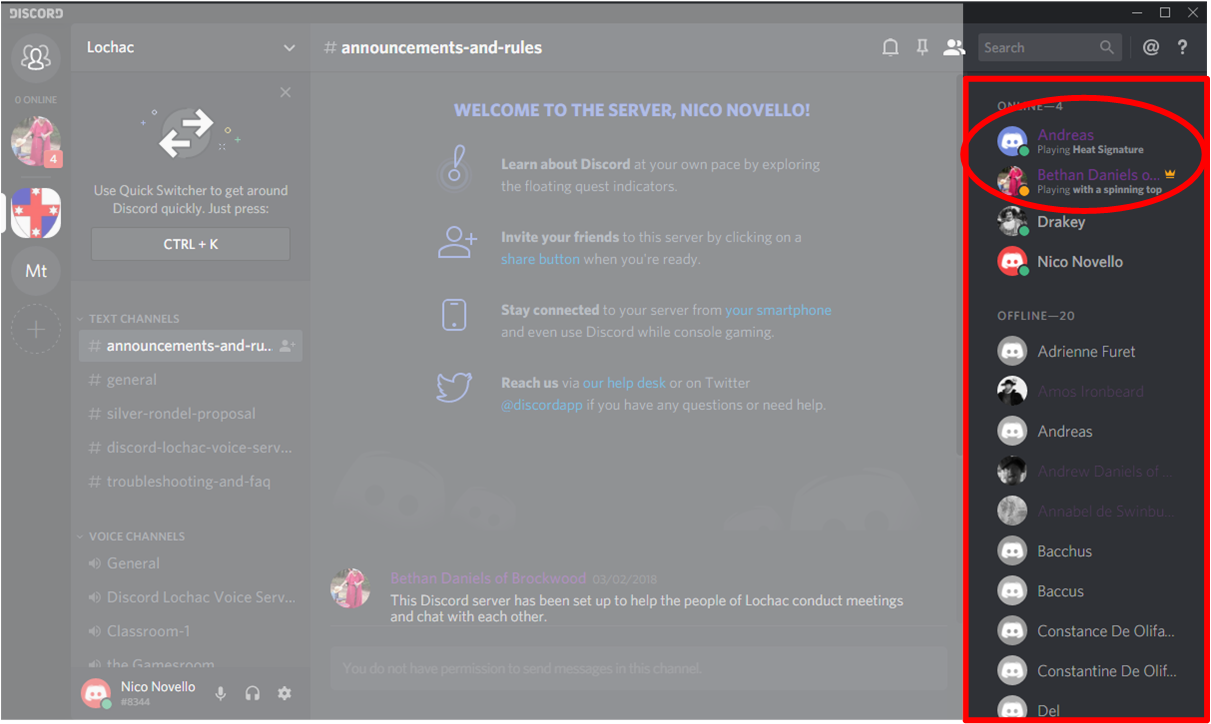
Over to the right, you will see the names of all the members of the server, divided into people who are currently online and offline. Notice that some of the names might be in purple, indicating that those people are server administrators (and the gold crown shows the server owner – not Lochac King or Queen).
Mute,Deafen, Settings Buttons (in that order)
Down the bottom, next to your name, you will see three very important buttons – mute/unmute your microphone, enable/deafen your sound, and settings. If you’re having trouble hearing or being heard, it’s a good idea to check down here, to see if you have your microphone or headphones switched off.

Server name
| Over at the extreme left, you will see the icon of the server you’re logged onto:
If you join other Discord servers in future, they’ll appear here, and you can jump from one to another.
|
 |
Private Messages
In the extreme top left corner, you’ll see an icon that lets you send and receive private text messages with other server users.
Voice Server Buttons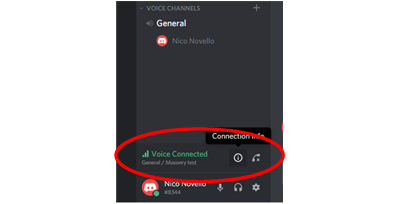
If you connect to one of the voice channels (by clicking on the name of the channel) you will see an extra couple of controls appear at the bottom left:
Clicking the Connection info button will bring up a display showing what the connection quality is like. If you are on a call, and the sound seems rough, this is a useful way of checking whether the problem is with the server, or on your PC.
Clicking the Disconnect button will disconnect you from the voice channel, but leaves you in the Lochac server.
Mute Notifications, Pinned Messages, Show Users, Search, Mentions and Help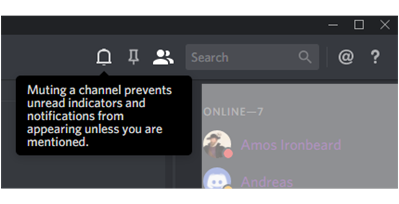
Up in the top right corner, you will see another set of icons. The first of these is Mute Notifications – this button doesn’t actually mute sound (that’s the mute button down by your name), but instead it “mutes” the display of text notifications.The next is Pinned messages – clicking this shows you any messages that the server manager has tagged.
The next icon will toggle whether or not the member list is visible on the right.
Then there is a Search field – click in it, and you will see a list of options for types of search you can run, such as looking for all posts by a particular member.
Clicking the @ symbol will show a list of all the times you have been mentioned by anyone else on the server.
And lastly, the ? (Help) icon links to a set of cheat sheets.
4: Account Settings
In order to access your Account settings, click the cog in the bottom left.
Settings Button

There are a LOT of things you can configure in Discord, but you don’t need to worry about most of them, if all you want to do is participate in teleconferences and chat sessions. You should look closely at the options under Privacy and Safety, and make your own decisions about what is right for you.
Changing your display name (your nickname)
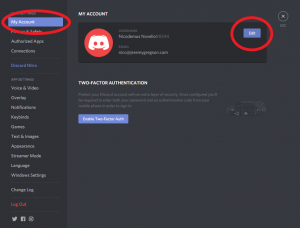
When you joined Discord, you will have nominated a nickname that is how you’re listed in screen. You
can change that at any time. From within the User Settings menu, select the top option, My Account. Then edit your username from there (you will have to provide your password again, before Discord will accept the change).
The ‘Voice and Video’ tab.
The settings button brings up a lot of options that you can change, but one of the most important is the voice tab:
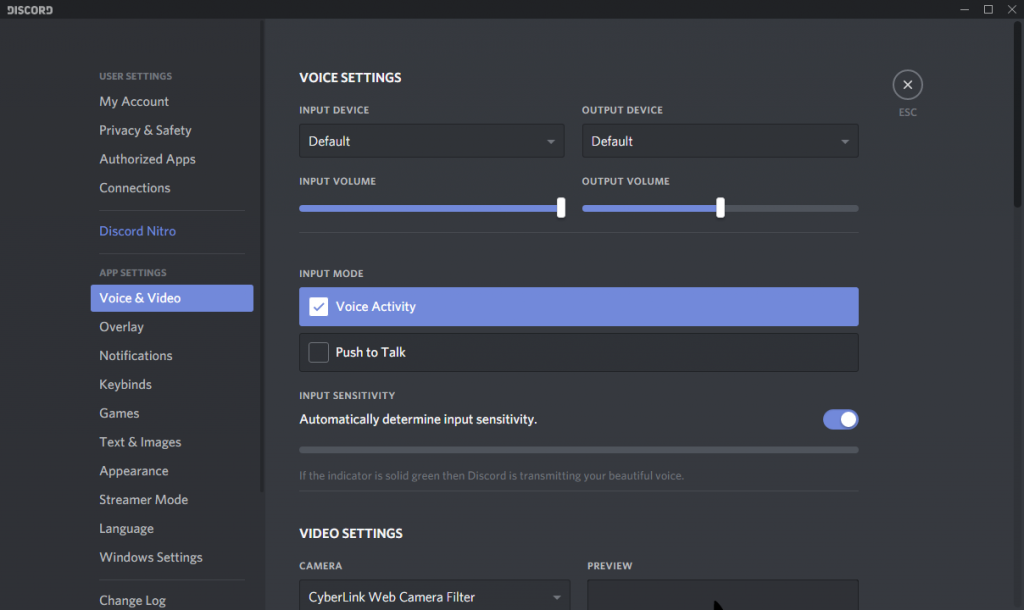
You can set your input and output device to whatever you use, but in most cases it should work on default. The input mode is the thing you might want to change. By default, it will be set to Voice Activity, which simply means your microphone is live. If you are in a noisy environment, you might need to change this to Push to Talk. That means that the microphone will be on mute, unless you press a key on the keyboard (like holding down the “talk” button on a walkie-talkie).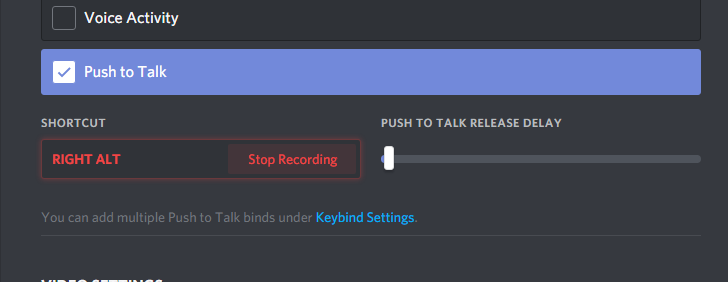
To switch to Push to Talk mode, you select the big, obvious button in the middle of the settings tab, and then “record a keybinding” – which means you decide what key(s) you want to use as your talk button. Press Edit Keybind, and whatever key(s) you press after that is captured as the “talk” button. To stop recording, click the Stop Recording button with the left mouse button.
After you’ve done that, when you return to the main screen and join a voice channel, you can check to make sure it’s working correctly pretty easily. Look at the icon for your name in the voice channel on the left: when you press your chosen key, a green ring should appear around the icon. When you release the key, the ring will disappear. You will also hear a sound, if you have that enabled in your notifications – which is the next thing to look at.
The ‘Notifications’ tab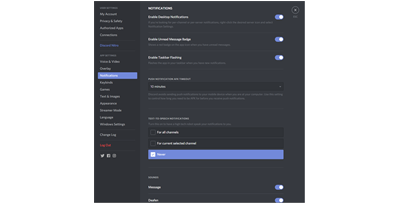
Discord lets you be very specific about what events you want to be alerted to. This tab lets you turn sound effects on and off for things like people joining or leaving a conversation, receiving a text message, and when you have pressed or released the push-to-talk button.
You can uncheck or leave checked any of the sounds you desire. If you’re using Push To Talk, ‘PTT Activate’, and ‘PTT Deactivate’ could become annoying for you, once you are confident of what you’re doing. At first, you will probably appreciate the extra feedback to let you know that you have pressed the right button (other people on the teleconference won’t hear it).
When the ‘Enable desktop notifications’ box is checked, it will ring your desktop every time a message is sent on the Discord server. That means that, if you have the app set up to open when you start your PC, and sit in the background, you will know whenever anyone is trying to reach you via Discord (a lot like Skype).
The ‘Appearance’ tab.
The Appearance tab offers several ways to change the look of Discord, some of which could make it much more (or less) readable for you. In the screenshot below, the default “dark” theme has been switched to “light”.
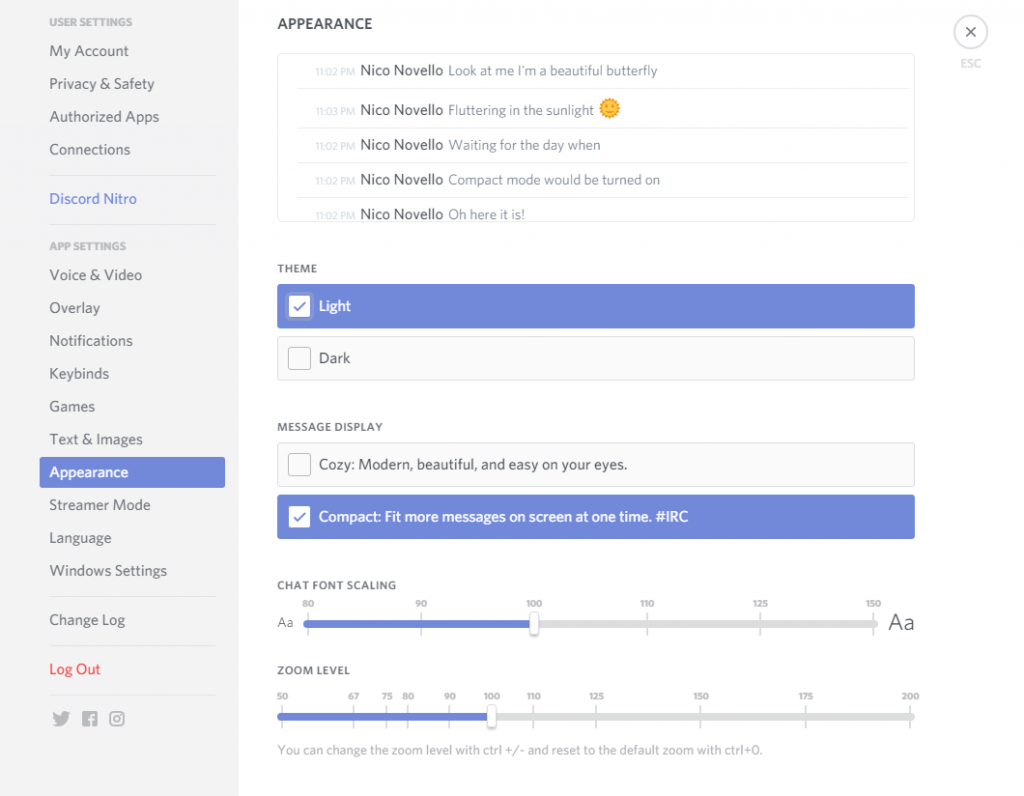
It is well worth playing around with these settings, to find what works best for you.
5: Server Settings
To open up your other Notifications section
But wait, there’s more! Apart from the settings that you configure for your user account, which will apply to all your Discord conversations, there is another set of notification settings that are just for the Lochac server. 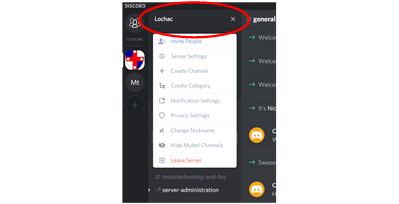 To find them, get out of the account settings screen that you are on by pressing the Escape key. Then, back on your home page, click on the Lochac server link at the top on the left:
You will see a drop-down list of things that you can set for this server, which will modify what you’ve already set in your general user preferences. But don’t click the bottom option – Leave Server – unless you actually want to leave for good. This isn’t a simple “logout” option, it removes the Lochac server from your Discord profile.
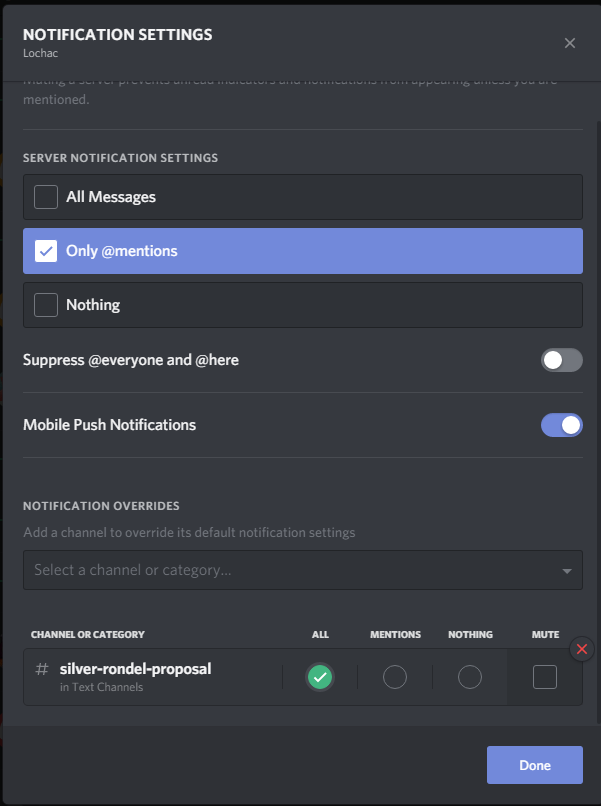
Server Notifications Settings
When you’re not actually logged onto the Lochac server, you can still get notifications to let you know when other people are posting. Or not. Decide here. If there are particular conversations you want to follow, you can single them out for special attention. In the screenshot below, I will only get notified about messages which mention/address me, except for the channel discussing the Silver Rondel – I will get notified about every post to that conversation.
6: Friends List
 Discord has a lot in common with Facebook. In Facebook, you can go to the Lochac home page and engage in a discussion by adding comments, and replying to other people’s posts. And you can tag people as “friends”, which opens up other options for chatting with them. In Discord, you can talk to people through the Lochac server text and voice channels, but you can also tag people as friends.
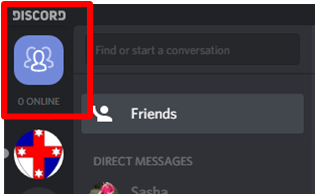
Click the friends icon at the top left.
This is what you’ll see.
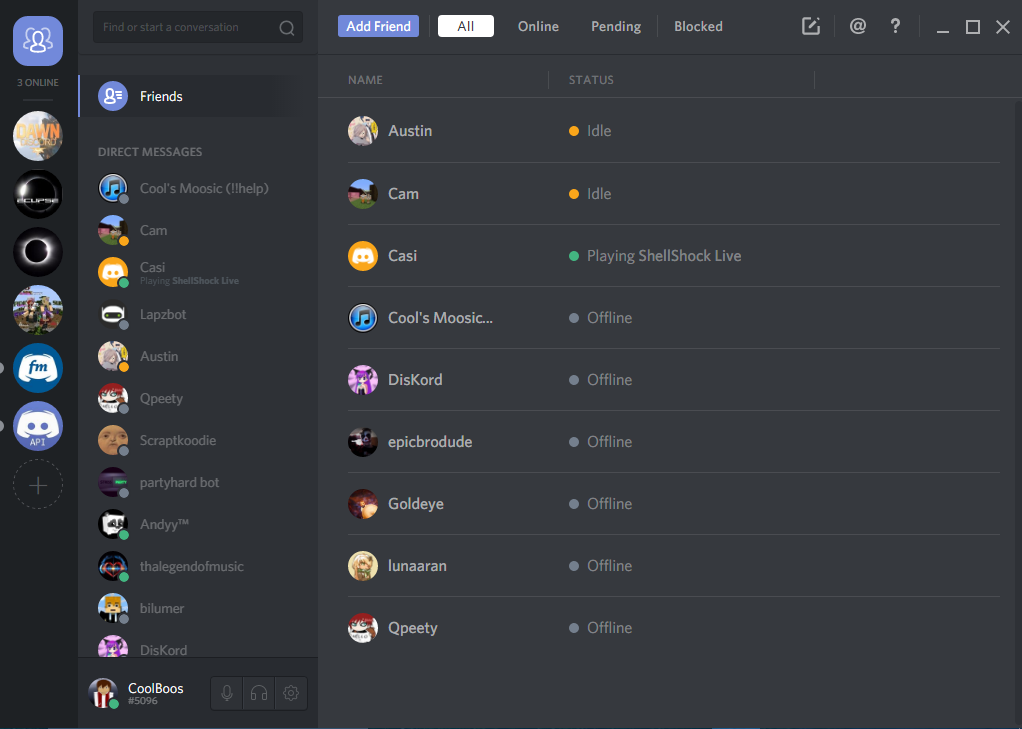
The screen is broken up into:
- Direct Messages = Those you have messaged
- Add friend = Adding a friend
- All Friends = All friends online and offline
- Online = Only those friends who are online
- Pending = Outgoing and incoming friend requests
- Blocked = Those you have blocked
To call someone, hover over their name, like this.
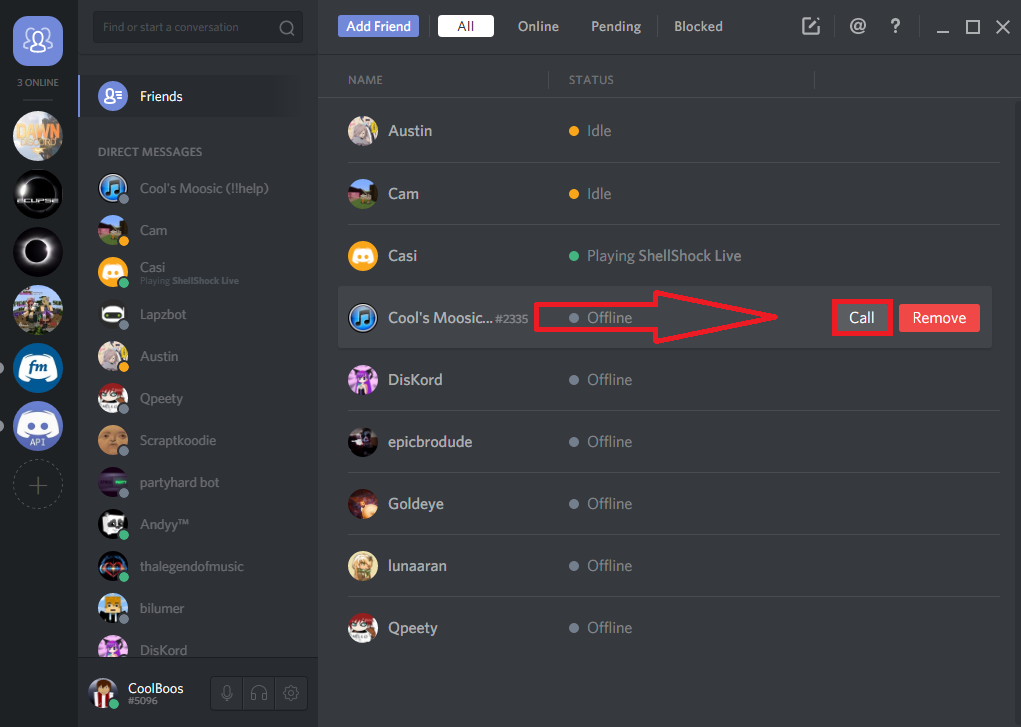
Calling A Friend
This is what calling a friend will look like.
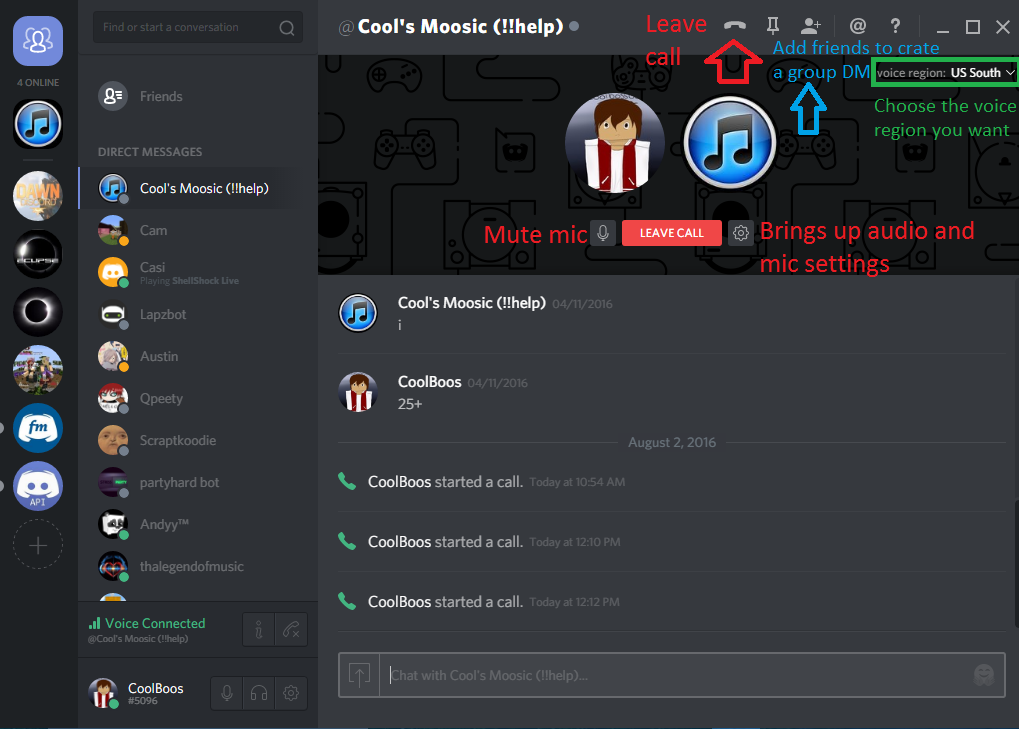
The Call
Group Direct Messages
A Group Direct Message (Group DM) is really just like a Skype call. Whereas the Discord voice channels are permanently open conference calls, that any Lochac member can drop into, a group DM is a conference call you set up with a few friends, which starts when you call them, and ends when you hang up. It really is JUST like a Skype call.
To set up a group DM, you simply select a few friends and then call them….
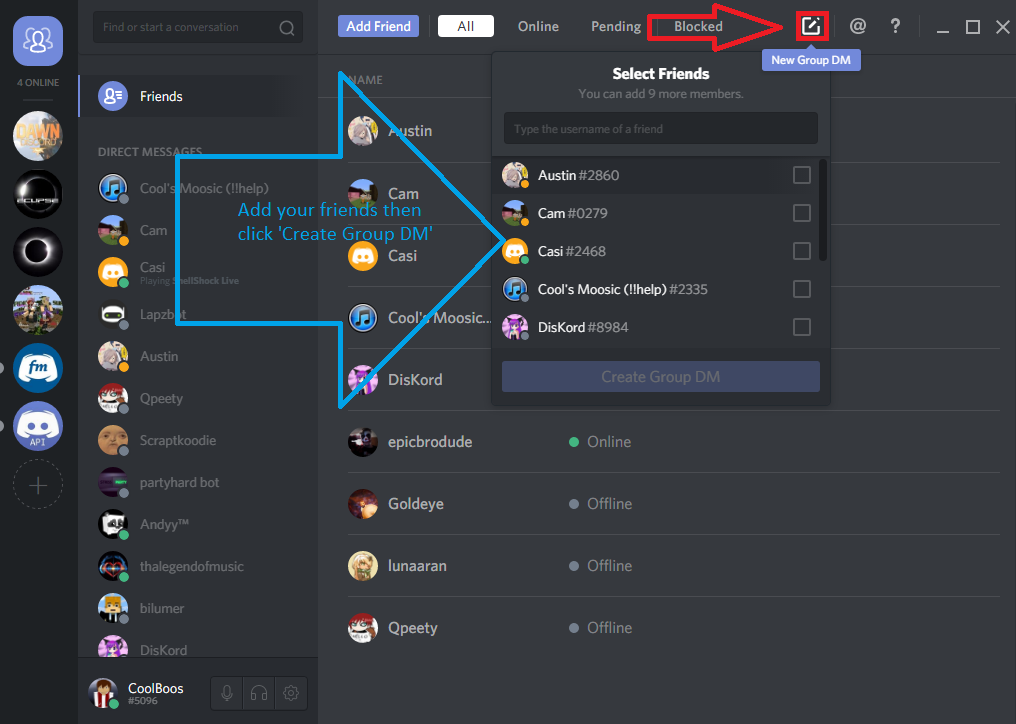
Setting Up A Group DM